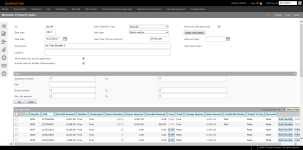
Property Sale Maintenance
Navigate:  Tax > Tax Sale > Property Sale > Property Sale Maintenance
Description
Create and maintain property sales.
Steps
- On the Search for Tax Sales screen, enter your search criteria and click Search.
-
In the Tax Sales panel, click on an item to open the Maintain Property Sales screen.
- In the header panel, make a selection from the Sale Collection Type drop-down list.
- Select the Allow pre-sale payments checkbox to allow the acceptance of payments before the sale date on the Collect Payments screen.
- Enter or edit the sale year.
- Make a selection from the Sale Type drop-down list.
- Click the Other Sale Dates button to open the pop-up.
-
Click Add new record.
-
Make a selection from the Other Sale Date drop-down list.
-
Enter a date or click the date picker to select it.
-
Click Insert to add the record.
-
Click Cancel to close the new record without saving.
-
Click Edit on an existing row to modify it.
-
Click Delete on an existing row to remove the record.
- Click Close when you are finished in the pop-up.
-
Optionally, enter the sale date, sale time, and sale end date.
NOTE: The Sale Close Date field is read-only. You close the sale when you run the Post Sale Teeter process and the Post Sale Buyer process when the sale is complete. The process internally sets an end date for the sale in order for the reoffer process to know a sale is closed/complete and shows this date.
- Enter a description.
-
Enter a location.
-
Optionally, select the Allow same day buyer registration checkbox.
-
Optionally, select the Include Sale for Reoffer Determination checkbox.
-
Click Save in the Command Item bar.

NOTE: This may not apply to your jurisdiction.
NOTE: Depending on your jurisdiction, if you select Sale by Agreement, an additional Postmarked field is added to the Tax Sale Items panel.
Filter Panel
- Use any of the following criteria to filter your results.
-
Sequence Number
-
PIN
-
Buyer Number
NOTE: Once saved, or if the Sale Type is Sealed Bid Sale, the Buyer Number becomes an active hyperlink in certain jurisdictions that, when selected, advances to the Edit Potential Buyers screen to:
-
Disqualify bids for which the bid amount is less than the min bid amount.
-
Validate the reason when the buyer status has changed.
-
Disqualify bids when the potential buyer is invalid.
-
Execute the closeout process.
-
-
Min. Bid Amount
NOTE: If Manual Bundling is set to True in Tax Sale Settings, then the Min Bid Amount is the amount of delinquent taxes for the bundled items only.
-
Click Go to display the results in the Tax Sale Items panel.
Tax Sale Items Panel
Add and edit existing tax sale item details. Click on a column header to sort the results by the selected column.
-
Click Edit on an existing tax sale item to update the details.
NOTE (California only): A Surplus icon displays next to tax sale items when a Credit Bid Deposit has been made (resulting in a surplus).
-
For any row for which the Participant checkbox is selected, you can maintain:
-
Min. Bid Amount
-
Buyer Number
NOTE: Once saved, or if the Sale Type is Sealed Bid Sale, the Buyer Number becomes an active hyperlink that opens the Edit Potential Buyers screen.
-
Buyer Amount
-
Overbid Amount
- Paid – This True checkbox is selected if the property sale is paid.
-
Change Reason – This field is required field when removing or changing a tax sale item and the Require Reason Codes application setting is set to True.
- Failed to Pay checkbox – When you run the Post Sale Buyer process Aumentum indicates whether or not the buyer paid for the sale item.
-
Click Apply.
-
Click Save in the Command item bar.
-
Click Add Bundle to open the Bundle Maintenance pop-up.
NOTE: When assets are bundled, the bundle is bid on as a group and can be paid as a total.
-
Click Add.
-
Enter the Sequence No.
-
Click Apply.
-
Click Override Legal to enter a Tax Sale Description for Bundled Items.
-
Click Show Bundle to toggle back to the Bundle Items view.
NOTE: If there are items with buyer amounts, you cannot delete the bundle. Otherwise, click Delete Bundle.
- Click Close.
-
Click Save in the Command Item bar.
NOTE: See Dependencies, Prerequisites, and Setup at the end of this topic for information about Tax Sale flags.
Fees Column
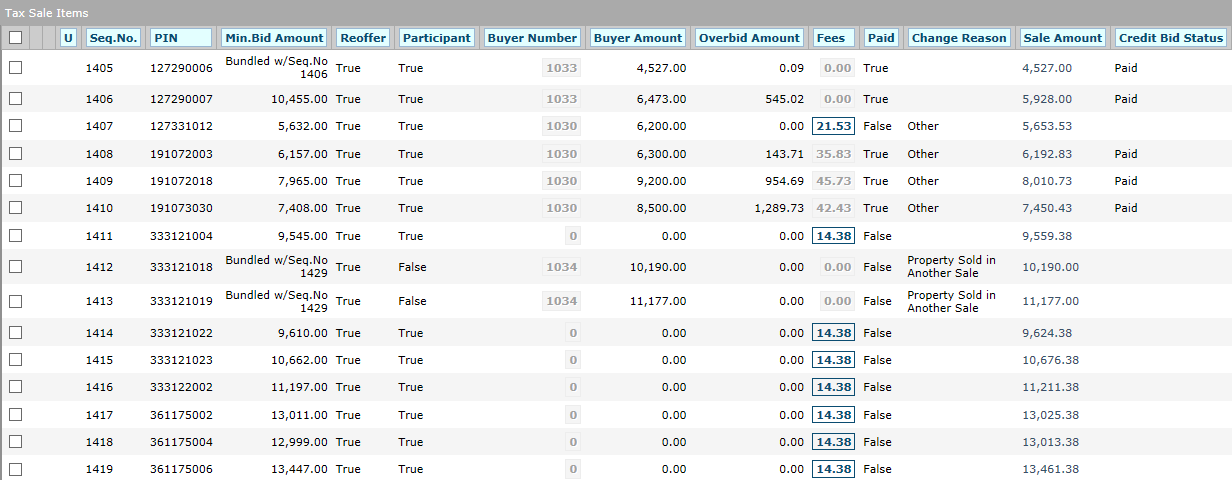
- In the Tax Sale Items panel, click on a fee with a box around it in the Fees column.
- In the Tax Sale Fees pop-up, make a selection from the Reason drop-down list.
-
In the Tax Sale Fees panel, click Add or Edit.
-
Make a selection from the Fee Description drop-down list.
-
Enter the Fee Amount.
-
Click Apply.
-
Click Save.
-
Click Return to close the pop-up. The Fees column is updated with the new information.
Mass Entry
-
In the Tax Sale Items panel header, click the Mass Enter button to open the Mass Enter Tax Sale Information screen and enter the bid amount and buyer number for multiple Tax Sale items. If the sale date is the same as the system effective date, a pop-up displays when you click Mass Entry.
NOTE: Items assigned to a buyer amount or buyer number cannot be removed from the bundle.
-
Click Save in the Command Item bar.
- Click Close to return to the Maintain Property Sales screen.
Processing Items
-
Hover over Process Items in the Tax Sale Items panel header to perform the following actions for the selected tax sale items:
-
Calculate Tax Sale Fees – opens the Monitor Batch Processes screen.
- More Information – opens the Property Sale Research screen.
- Interested Parties – opens the Parties of Interest Maintenance screen.
-
Copy Delinquent Groups Parties of Interest – opens the Copy Delinquent Group Parties of Interest screen.
-
Title Search Company – opens the Edit Title Search Company screen.
-
Vesting Information – opens the Vesting Information screen.
NOTE: The vesting information you define is printed on the property sale notices and on the Assessor Report. Vesting information is imported via Tax > Property Sale > Export/Import > Vesting Configuration.
NOTE (Riverside, California): Vesting Information is disabled for unsecured asset sales.
-
Get Legal Parties of Interest – generates a Parties of Interest batch process to locate legal parties associated with the revenue object and tax sale. The Select Roles to include for Interested Parties pop-up opens.
-
Remove Unsold Items from Sale – removes the Tax Sale flag from unsold items and from revenue objects and legal parties associated with the unsold items. Also, the Participant option is changed to false for unsold items. The Monitor Batch Processes screen opens.
NOTE (Riverside, California): Remove Unsold Items is disabled for unsecured asset sales.
-
Restore Min Bid – restores the minimum bid values to the property sale item. The Min. Bid Amount is updated for the selected tax sale items that are participants and do not have a buyer number assigned. The Minimum Bid Amount is calculated based on Estimation Configuration and includes fees attached to the estimated tax amount. If no fees have been configured, you will see the message, "No fees are configured to be included in this calculation." Click OK to continue, or click Cancel.
-
Estimate – opens the Calculate Estimated Sale Amount dialog. If you are including the estimated fees, the estimation configuration must be completed. Click Update.
NOTE (Riverside, California): Estimate is disabled for unsecured asset sales.
-
Move Items – opens the Move Items dialog. Make your selections from the drop-down lists and click Update.
-
Copy Items when copying items to more than one tax sale.
NOTE: The application setting Allow Property to be in Multiple Secure Sales set to True allows tax sale items to be in multiple tax sales, and allows the tax sale in the Publication List to be in multiple secure sales. When a tax sale with multiple items is cashiered, the status of any tax sale item also in another tax sale is set automatically to Non Participant in the non-cashiered tax sale with a Change Reason set to Sold in Another Sale. The Assessor, Auctioneer, and Tax Sale Balance reports include an additional Multiple Sales column that contains a count of the number of tax sales in which an item is participating if this setting is set to True and there are multiple items in a secure tax sale. The Copy function is used to copy the item from one tax sale to another. a Multiple Sale link in the header of the Info Center > Tax Information screen for any items in multiple sales opens a pop-up to select the particular tax sale, which opens the Tax Sale Information screen with the selected tax sale information loaded.
-
Click Save in the Command Item bar.
NOTE: If the Postmarked date is later than or equal to the Publication date, a warning message displays and you cannot move the items. If the Publication date does not exist for the destination property sale, any date is acceptable as a Postmarked date.
Tax Bills for Sale Item Panel
-
Click Edit on any row for which the button is available to expand the Tax Bills for Sale Item panel.
Deleting and Saving
-
Click Delete in the Command Item bar to delete the selected property sale item. Click OK in the pop-up to confirm the deletion.
-
Click Save in the Command Item bar.
Dependencies, Prerequisites, and Setup
Jurisdiction Specific Information
Tax Sale Flag
To determine whether or not the flag status changes to Inactive when a tax sale item is marked as not participating:
- Click Configuration > Application Settings.
- On the Maintain Application Settings screen, select Effective Date from the Setting type drop-down list, and select Tax Sale from the Filter by module drop-down list.
- Locate Remove Tax Sale flag when item set as Non Participating and click Edit.
- In the Setting Value column, select the checkbox to set this as True (remove Tax Sale flag), or clear the checkbox to set this as False (do not remove Tax Sale flag).
- Click Apply, then click Save in the Command Item bar.
Maintain Bill of Sale Information
You can move assets to unsecure sales for a tax sale case with assets and an unsecure tax sale. To set this up:
-
Click Configuration > Application Settings.
-
in the Maintain Application Settings screen, select Effective Date from the Setting type drop-down list, and Tax Delinquents from the Filter by module drop-down list.
-
Find Case Mgmt Class for Field Enforcement and click Edit.
- Make a selection from the drop-down list in the Setting Value field and click Apply.
- Click Save in the Command Item bar.
-
Next, click Case Management > Configuration > Cases.
- In the CM Configuration - Cases screen, select Case Class from the Category drop-down list.
- Select the checkbox for one or more items in the Case Class panel and click Edit.
- Modify the editable fields and click Apply.
-
Click Save in the Command Item bar, then click Close.
Once you have set this up, then:
-
Click Case Management > Cases > Case Search.
-
In the Case Management Search screen, enter your search criteria and click Search.
- In the Results panel, select the case associated with the selected class defined by the application setting.
-
Click View Detail and select the Assets tab.
-
Click on the Add to Sale button, select a Tax Year, and define a Sale Description.
-
Check the Calculate MinBidAmount checkbox and click on the Accept button.
A tax sale item is created for each asset selected (for which a tax sale has not yet occurred). The formula for the Min Bid Amount shown on the Maintain Property Sales screen for the tax sale item is set as follows:
-
MinBidAmount = AssetValue / Sum of all selected Asset Values * Revenue Object Amount Due
-
Recalculation of a Minimum Bid Amount for a Buyer type of Non-Profit. Minimum bid amounts can be recalculated for sales types of Agreement Sale for non-profit buyers. This value is the sum of fees plus the Land Value plus the structural value. To set this up:
-
Click Configuration > Application Settings > Maintain Application Settings. Click Edit on the Tax Sale setting of Recalculate Residential Items amount due, and select the checkbox to set to true.
-
Set up the buyer as a Non-profit type via Buyer Maintenance (Tax > Tax Sale > Buyer Maintenance).
-
The Sale Type must be an Agreement Sale.
-
Edit the property sale item, and change the buyer ID to a Non-Profit buyer if working with an existing buyer by clicking on the buyer ID number to navigate to the Edit Potential Buyers screen.
-
When saving the property sale, the Minimum Bid Amount is recalculated.
NOTE: To accommodate this, the Agreement Sale Buyer Notices (Tax > Tax Sale > Property Sale > Buyer Notices) has been modified to include an additional set of child data for Objections and for Non-participating tax sale items.
-
Items are marked as removed from the tax sale agreement if they meet the following criteria:
-
The agreement of sale Status [Tax Sale] is Resolution Received or a subsequent status.
-
The Postmark Date [Tax Sale] of the resolution is before the First Publication Date [Tax Sale].